


Deep Learning Installation Tutorial - Index
Dear fellow deep learner, here is a tutorial to quickly install some of the major Deep Learning libraries and set up a complete development environment.
- Part 1 : Installation - Nvidia Drivers, CUDA and CuDNN
- Part 2 : Installation - Caffe, Tensorflow and Theano
- Part 3 : Installation - CNTK, Keras and PyTorch
- Part 4 : Installation - Docker for Deep Learning
Deep Learning Installation Tutorial - Part 4 - Docker for Deep Learning
There are a few major libraries available for Deep Learning development and research – Caffe, Keras, TensorFlow, Theano, and Torch, MxNet, etc. These libraries use GPU computation power to speed up deep neural networks training which can be very long on CPU (+/- 40 days for a standard convolutional neural network for the ImageNet Dataset).
NVIDIA is definitely the GPU brand to go for Deep Learning applications, and for now, the only brand broadly supported by deep learning libraries.
In these Tutorials, we will explore how to install and set up an environment to run Deep Learning tasks.
A few useful links :
- NVIDIA Drivers and Libraries:
- Deep Learning Libraries and Frameworks:
- Caffe: http://caffe.berkeleyvision.org
- Caffe2: https://caffe2.ai
- Microsoft Cognitive Toolkit: https://www.microsoft.com/en-us/cognitive-toolkit
- DeepLearning4J: https://deeplearning4j.org
- Keras: https://keras.io/
- Lasagne: http://lasagne.readthedocs.io/en/latest
- MxNet: http://mxnet.io
- PyTorch: http://pytorch.org/
- Tensorflow: https://www.tensorflow.org/
- TensorLayer: http://tensorlayer.readthedocs.io/en/stable/
- Theano: http://deeplearning.net/software/theano
- Torch: http://torch.ch
- Development Environments:
- Apache Singa: http://singa.apache.org
- DeepForge: https://github.com/deepforge-dev/deepforge
- Digits: https://developer.nvidia.com/digits
- Polyaxon: https://github.com/polyaxon/polyaxon
- Virtualisation Platforms:
- Docker: https://www.docker.com
- Nvidia-Docker: https://github.com/NVIDIA/nvidia-docker
In this post, we will install the following libraries:
- Docker: "Docker is an open platform for developers and sysadmins to build, ship, and run distributed applications, whether on laptops, data center VMs, or the cloud." (Source)
- Nvidia-Docker: "Nvidia-Docker is a plugin to the original Docker platform which allow containers to interact with Nvidia GPUs." (Source)
A. Installing Docker
Docker is a very pratical and lightweight platform to quickly deploy virtual machines called containers. This article will not explore the difference between a virtual machine and a container, just remember these few facts:
- Faster to launch
- Reduced footprint on system memory
- Reduced footprint on disk.
- Open-Source platform
- Hardware-agnostic
- Platform-agnostic
To install docker, we need to add the Docker official repository:
curl -fsSL https://download.docker.com/linux/ubuntu/gpg | sudo apt-key add -
sudo add-apt-repository "deb [arch=amd64] https://download.docker.com/linux/ubuntu $(lsb_release -cs) stable"
Once done, we need to update the repositories:
sudo apt-get update
Finally install docker:
sudo apt-get install -y docker-ce
Check the installation is correct:
sudo systemctl status docker

# Output:
docker.service - Docker Application Container Engine
   Loaded: loaded (/lib/systemd/system/docker.service; enabled; vendor preset: enabled)
   Active: active (running) since Sun 2016-05-01 06:53:52 CDT; 1 weeks 3 days ago
     Docs: https://docs.docker.com
 Main PID: 749 (docker)
Docker is now up and running, the daemon will automatically start at boot. However, the use of the sudo command is required to interact with the Docker-CLI (Command Line interface). In order to simplify the use of Docker, we will give to ourself the right to directly use the Docker-CLI.
sudo usermod -aG docker ${USER}
su - ${USER} # Reload the user rights

#### If you need to give access to docker to a user which you are not logged in, you can use the following command:
sudo usermod -aG docker <username>
Now let us perform a small test:
docker run hello-world

# Output
Hello from Docker.
This message shows that your installation appears to be working correctly.
If you correctly see this message, everything is fine and you are ready to install nvidia-docker. If it doesn't work, check your networking settings (proxy, vpn, etc.)
A few helpful commands:
docker ps: List the containers currently running on your machine.docker ps -a: List all the containers existing on your machine.docker images: List the images currently available on your machine.docker rmi IMAGE_ID: Remove an image based on its image_id (available throughdocker images).docker pull USER/IMAGE_NAME: Download a given image to your machine.docker run .....: Create a new container.docker start CONTAINER_ID: Start an existing container based on its container_id (available throughdocker ls).docker start ALIAS: Start an existing container based on its alias (available throughdocker ls).docker stop CONTAINER_ID: Stop a container based on its container_id (available throughdocker ls).docker stop ALIAS: Stop a container based on its alias (available throughdocker ls).docker rm CONTAINER_ID: Delete a container based on its container_id (available throughdocker ls).docker rm ALIAS: Delete a container based on its alias (available throughdocker ls).docker exec -it CONTAINER_ID bash: Create an SSH session into a running container based on its container_id (available throughdocker ls).docker exec -it ALIAS bash: Create an SSH session into a running container based on its alias (available throughdocker ls).
B. Installing Nvidia-Docker
Docker is up and running, and that's awesome! However, due to the fact that containers are hardware-agnostic and platform-agnostic, it is impossible to access the GPUs from inside a container. Which is, you must admit, a big lame for any deep learner. So Nvidia came up with a plugin designed to solve this problem: Nvidia-Docker.
Installation:
# Install nvidia-docker and nvidia-docker-plugin
wget -P /tmp https://github.com/NVIDIA/nvidia-docker/releases/download/v1.0.1/nvidia-docker_1.0.1-1_amd64.deb
sudo dpkg -i /tmp/nvidia-docker*.deb && rm /tmp/nvidia-docker*.deb

# Test nvidia-smi
nvidia-docker run --rm nvidia/cuda nvidia-smi

# Output:
+-----------------------------------------------------------------------------+
| NVIDIA-SMI 375.66                 Driver Version: 375.66                    |
|-------------------------------+----------------------+----------------------+
| GPU  Name        Persistence-M| Bus-Id        Disp.A | Volatile Uncorr. ECC |
| Fan  Temp  Perf  Pwr:Usage/Cap|         Memory-Usage | GPU-Util  Compute M. |
|===============================+======================+======================|
|   0  GeForce GTX TIT...  Off  | 0000:05:00.0      On |                  N/A |
| 22%   39C    P8    16W / 250W |      1MiB / 12207MiB |      0%      Default |
+-------------------------------+----------------------+----------------------+
|   1  GeForce GTX TIT...  Off  | 0000:06:00.0     Off |                  N/A |
| 22%   39C    P8    14W / 250W |      1MiB / 12207MiB |      0%      Default |
+-------------------------------+----------------------+----------------------+
|   2  GeForce GTX TIT...  Off  | 0000:09:00.0     Off |                  N/A |
| 22%   34C    P8    14W / 250W |      1MiB / 12207MiB |      0%      Default |
+-------------------------------+----------------------+----------------------+

+-----------------------------------------------------------------------------+
| Processes:                                                       GPU Memory |
|  GPU       PID  Type  Process name                               Usage      |
|=============================================================================|
+-----------------------------------------------------------------------------+
If you see the nvidia-smi report as shown above, then everything is perfectly up and running.
We can now start using docker quickly deploy containers with all the necessary libraries to train our models.
C. What can I do with Docker and Nvidia-Docker?
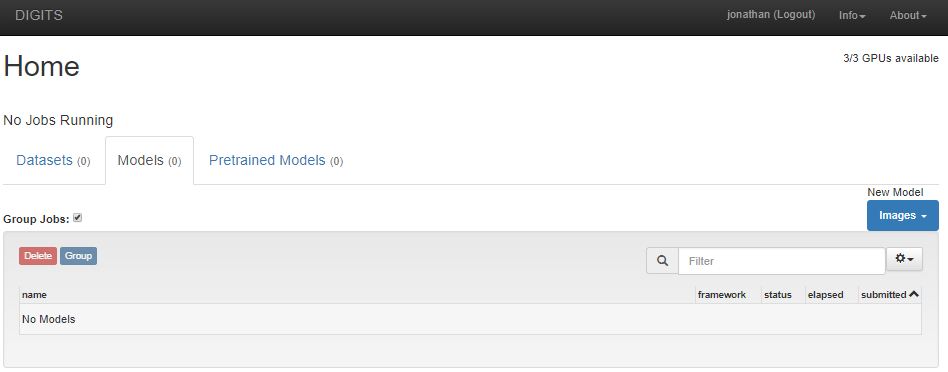
C.1 Docker ❤️ Nvidia Digits
Nvidia developed a system called Digits to quickly prototype and launch deep learning models. Of course, we can simply run this platform using nvidia-docker.
# We download the image from the Docker-Hub: https://hub.docker.com/r/nvidia/digits/
docker pull nvidia/digits

# Run DIGITS on host port 5000
nvidia-docker run -d -p 5000:5000 -v /datafolder/digits/data/:/data/ -v /datafolder/digits/jobs/:/jobs --name digits nvidia/digits
Open now : https://server-ip:5000
C.2 Docker ❤️ Tensorflow
You want to run Tensorflow ? No problem, Docker can do this!
With GPU Support Enabled
# We download the image from the Docker-Hub: https://hub.docker.com/r/tensorflow/tensorflow/
docker pull tensorflow/tensorflow:latest-gpu-py3
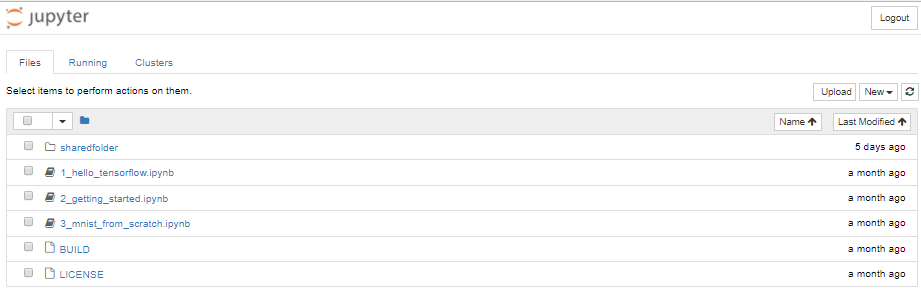
# Run Tensorflow with port 8888 and 6006 opened: 8888 => Jupyter Notebook and 6006 => TensorBoard.
nvidia-docker run -d -p 6006:6006 -p 8888:8888 -v /datafolder/tensorflow_nb/:/notebooks/sharedfolder -e PASSWORD=MY_CUSTOM_PASSWORD --name tensorflow tensorflow/tensorflow:latest-gpu-py3
Without GPU Support Enabled, CPU only
# We download the image from the Docker-Hub: https://hub.docker.com/r/tensorflow/tensorflow/
docker pull tensorflow/tensorflow:latest-py3

# Run Tensorflow with port 8888 and 6006 opened: 8888 => Jupyter Notebook and 6006 => TensorBoard.
nvidia-docker run -d -p 6006:6006 -p 8888:8888 -v /datafolder/tensorflow_nb/:/notebooks/sharedfolder -e PASSWORD=MY_CUSTOM_PASSWORD --name tensorflow tensorflow/tensorflow:latest-py3
Open now : https://server-ip:8888
C.3 Docker ❤️ TensorLayer
Very interesting features can be added to Tensorflow using the library TensorLayer. The TensorLayer container is based on the official Tensorflow container and thus have the same arguments and structure.
With GPU Support Enabled
# We download the image tensorlayer the Docker-Hub: https://hub.docker.com/r/tensorlayer/tensorlayer/
docker pull tensorlayer/tensorlayer:latest-gpu-py3

# Run TensorLayer with port 8888 and 6006 opened: 8888 => Jupyter Notebook and 6006 => TensorBoard.
nvidia-docker run -d -p 6006:6006 -p 8888:8888 -v /datafolder/tensorlayer_nb/:/notebooks/sharedfolder -e PASSWORD=MY_CUSTOM_PASSWORD --name tensorlayer tensorlayer/tensorlayer:latest-gpu-py3
Without GPU Support Enabled, CPU only
# We download the image tensorlayer the Docker-Hub: https://hub.docker.com/r/tensorlayer/tensorlayer/
docker pull tensorlayer/tensorlayer:latest-py3

# Run TensorLayer with port 8888 and 6006 opened: 8888 => Jupyter Notebook and 6006 => TensorBoard.
nvidia-docker run -d -p 6006:6006 -p 8888:8888 -v /datafolder/tensorlayer_nb/:/notebooks/sharedfolder -e PASSWORD=MY_CUSTOM_PASSWORD --name tensorlayer tensorlayer/tensorlayer:latest-py3
Open now : https://server-ip:8888
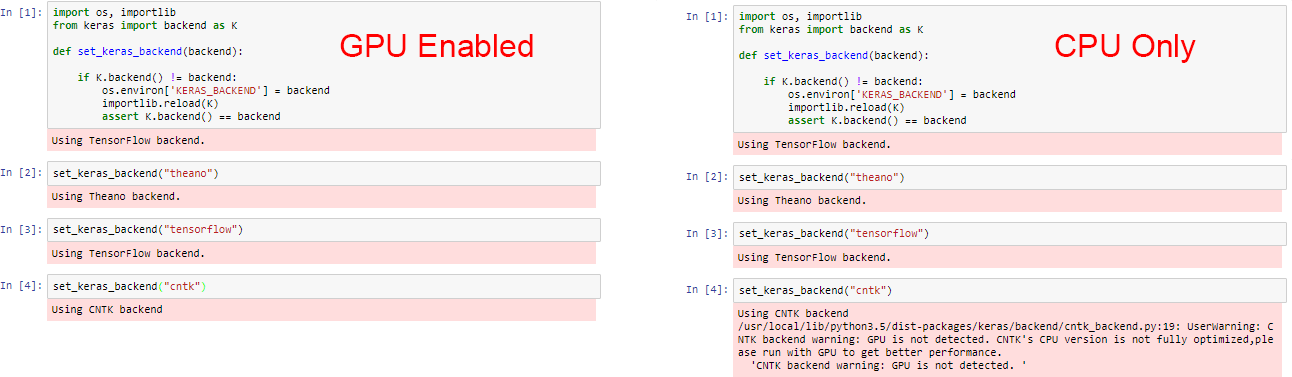
C.4 Docker ❤️ Keras with Tensorflow, Theano and CNTK
You would like a more higher level API and want to use Tensorflow, Theano or CNTK seemlessly with Keras? The docker image I created will perfectly suit your needs.
With GPU Support Enabled
# We download the image from the Docker-Hub: https://hub.docker.com/r/born2data/docker-keras-full

# With GPU Support
docker pull born2data/docker-keras-full:gpu
nvidia-docker run -d -p 8888:8888 -p 6006:6006 -v /datafolder/keras:/srv born2data/docker-keras-full:gpu
Without GPU Support Enabled, CPU only
# We download the image from the Docker-Hub: https://hub.docker.com/r/born2data/docker-keras-full
docker pull born2data/docker-keras-full
docker run -d -p 8888:8888 -p 6006:6006 -v /datafolder/keras:/srv born2data/docker-keras-full
Open now : https://server-ip:8888
C.5 Docker ❤️ PyTorch
You would like to use the Deep Learning Library PyTorch, Docker can also run this !
With GPU Support Enabled
# We download the image from the Docker-Hub: https://hub.docker.com/r/born2data/docker-keras-full

# With GPU Support
docker pull born2data/pytorch
nvidia-docker run -d -p 8888:8888 -e PASSWORD=MY_CUSTOM_PASSWORD -v /datafolder/pytorch:/workspace --name pytorch born2data/pytorch
Without GPU Support Enabled, CPU only
docker pull born2data/pytorch
docker run -d -p 8888:8888 -e PASSWORD=MY_CUSTOM_PASSWORD -v /datafolder/pytorch:/workspace --name pytorch born2data/pytorch
Open now : https://server-ip:8888
D. Conclusion
Docker is a really helpful tool, feel free to explore and install any container available on docker hub: https://hub.docker.com/
Comments !